Pour some flour into the sink, there are good reasons to do so: here are which ones
It might sound like a kitchen disaster waiting to happen — putting flour in the sink. Most people would instantly think, “Absolutely not!” But surprisingly, there’s a good reason why this old-fashioned trick is making a comeback. When used correctly, flour can make your stainless-steel sink shine like new — without harsh chemicals, expensive cleaners, or hours of scrubbing. Let’s explore how this unexpected ingredient can transform your sink and why it’s worth trying.
The Everyday Struggle: Keeping the Sink Clean and Shiny
Our sinks are among the most used areas in the kitchen. They endure constant wear and tear from food scraps, soap, hard water, and greasy residue. Over time, these elements cause the surface to lose its natural shine. Stainless steel, although durable, is particularly prone to water spots and dullness. Even a single droplet can leave a visible mark.
No matter how often we clean it, the result rarely lasts. Commercial cleaners for stainless steel promise a mirror finish, but they come with downsides: they’re costly, often full of harsh chemicals, and not exactly environmentally friendly. Over time, using these products not only strains your wallet but also contributes to household pollution.
So, how can you restore your sink’s brilliance naturally and sustainably? The answer lies in an age-old household secret — flour.
The Secret Trick from the Past
Long before modern cleaning products filled supermarket shelves, our grandmothers relied on simple, natural materials for their cleaning routines. Flour, a pantry staple, was one of their go-to solutions for polishing metal surfaces — including kitchen sinks.
At first glance, it may sound counterintuitive. Flour and water together make a sticky paste, the last thing you’d want in your pipes. But when used the right way — on a completely dry surface — flour works wonders as a gentle, eco-friendly polishing agent that restores shine without scratching the steel.
What You’ll Need
To try this method at home, you’ll only need a few basic items:
-
Flour (regular all-purpose flour works perfectly)
-
Hot water
-
A soft cloth or microfiber towel
-
A dry kitchen towel or paper towel
That’s it! No special tools or expensive cleaners are required.
Step 1: Clean Your Sink as Usual
Start by washing your sink thoroughly with your regular dish soap and a soft, non-abrasive sponge. This first step removes grease, stains, and any buildup of residue that could interfere with the polishing process. Rinse everything well with hot water.
Then — and this part is crucial — dry the sink completely. Use a soft towel or microfiber cloth to remove every drop of water. Make sure no moisture remains, not even around the faucet, the edges, or the drain area.
Why is this so important? Because flour reacts with water to form a paste. If there’s even a tiny bit of moisture left, you’ll end up with a sticky mess that clings to the surface instead of polishing it. A perfectly dry sink is the key to success.
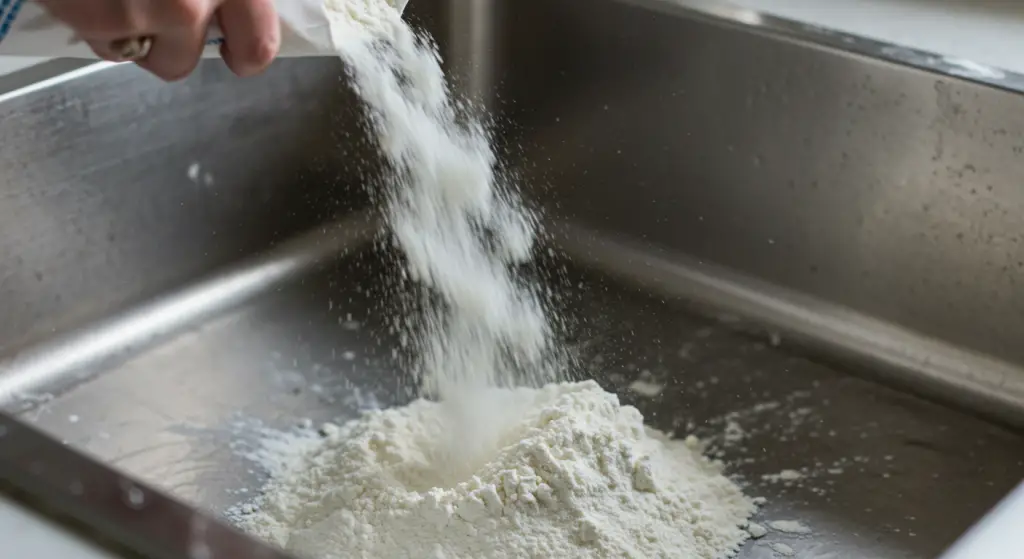
Step 2: Apply the Flour
Once your sink is completely dry, sprinkle a small amount of flour over the surface — just enough to cover it lightly. You don’t need much; a few tablespoons are usually enough for a standard kitchen sink.
Now take a soft paper towel or a dry cloth and begin to rub the flour gently in circular motions. As you polish, you’ll start to notice the surface becoming brighter and smoother. Continue to buff every part of the sink — the basin, the faucet, the drain area, and even the metal dish rack if you have one.
This simple motion helps lift away dullness and minor stains, restoring the metal’s natural luster.
Step 3: Remove the Flour Carefully
After polishing, you’ll see that the stainless steel now looks mirror-bright. All that’s left to do is remove the flour. Be careful not to rinse it directly into the drain — remember, flour and water together form a glue-like paste that can clog your pipes.
Instead, use a dry towel or paper towel to collect all the flour and dispose of it in the trash. Once you’ve removed the excess, you can give the sink a quick final wipe to ensure no powdery residue remains.
Why Flour Works
The science behind this trick is simple. Flour is a mild abrasive, fine enough not to scratch stainless steel but effective enough to buff away minor surface imperfections. It acts much like a polishing compound, removing dull film and restoring shine.
Because it’s completely natural, flour also doesn’t release fumes or residues, making it a safe choice for households with children, pets, or anyone sensitive to chemical cleaners. Plus, it’s eco-friendly — no plastic packaging, no toxins, and no wastewater contamination.
A Few Tips for the Best Results
-
Always make sure your sink is 100% dry before applying flour. Even the smallest trace of moisture can ruin the effect.
-
Don’t overuse flour — a thin layer is more than enough to polish effectively.
-
Avoid using this method on granite, composite, or ceramic sinks, as the results may vary. It’s best suited for stainless steel.
-
Perform this polishing step about once a week or whenever your sink starts to look dull.
The Final Result: A Sink That Sparkles
After just a few minutes of polishing, your sink will gleam like it did the day it was installed — no streaks, no cloudy patches, just pure shine. This simple flour trick is a perfect example of how traditional, natural cleaning methods can outperform modern chemical products.
It’s inexpensive, environmentally friendly, and incredibly easy to do. With just a handful of flour and a bit of elbow grease, you can restore your kitchen sink to its original brilliance — and maybe even make your grandmother proud for keeping her clever trick alive.
So next time you finish cleaning your kitchen, reach for that bag of flour — not for baking, but for polishing. You’ll be amazed at the results.