Refrigerator gaskets are black and dirty: how to clean them in two steps
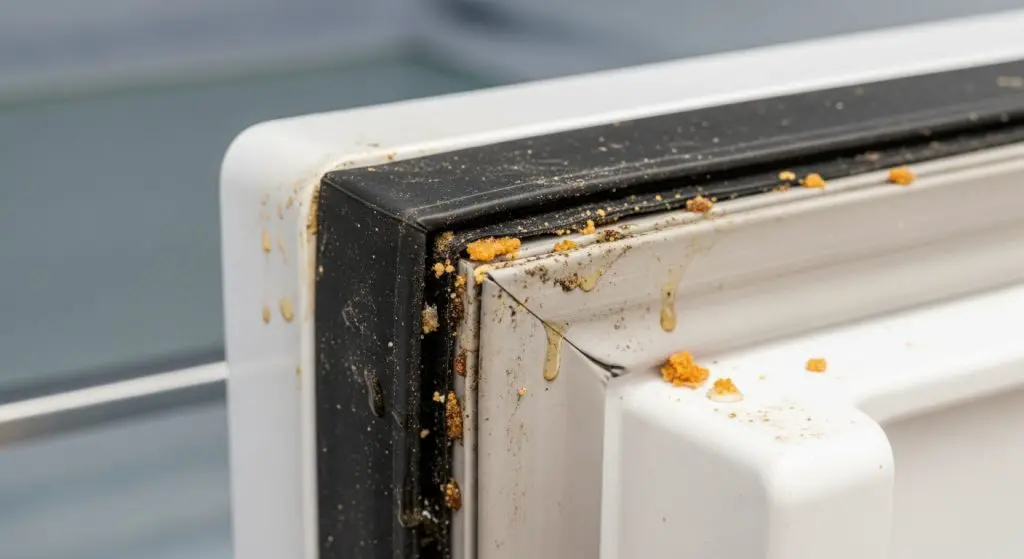
Over time, refrigerator door seals tend to accumulate dirt, grime, and even mold. Because the refrigerator is a cool and humid environment, it becomes the perfect breeding ground for mold spores that thrive in moisture and darkness. The rubber seals, or gaskets, around the fridge door are especially prone to this problem. If you start to notice black spots, unpleasant odors, or sticky residue, it’s time to act fast. After all, the refrigerator is where you store your food, so keeping it hygienic isn’t just about cleanliness—it’s about your health.
If not cleaned regularly, the seals can harbor germs, bacteria, and mold colonies that could contaminate your food. This may not only affect the taste and freshness of your groceries but can also pose a potential health risk. To avoid this, it’s important to disinfect the seals thoroughly at least every two weeks. The good news? You can do this with everyday household items and just a few simple steps.
Why Refrigerator Seals Get Dirty So Easily
The rubber lining on refrigerator doors is designed to keep the cold air inside and the warm air out. However, this same rubber surface can easily trap food particles, moisture, and crumbs every time the door is opened. Over time, this trapped residue becomes the ideal environment for mold and mildew.
The situation can worsen if you live in a humid climate or if you frequently spill liquids inside the fridge. Even small splashes of juice, sauce, or milk can seep into the tiny folds of the gasket, where bacteria quickly multiply. That’s why a regular cleaning routine is essential to maintaining both hygiene and performance—dirty seals can also reduce your refrigerator’s efficiency by preventing a proper airtight closure.
Deep Cleaning and Whitening the Seals
Cleaning refrigerator seals doesn’t require harsh chemicals or expensive cleaning products. You can achieve spotless results using a few common household items:
You’ll need:
-
An old toothbrush
-
A bowl of water
-
Toothpaste
-
A clean cloth or microfiber towel
-
White vinegar
-
Rubber gloves (optional but recommended)
Step 1: Prepare the seals
Begin by unplugging your refrigerator or turning it off for safety. Then, use a damp cloth to wipe away any loose debris or visible dirt from the gasket. This will make the deep-cleaning process more effective.
Step 2: Apply toothpaste
Toothpaste isn’t just for your teeth—it’s mildly abrasive and contains cleansing agents that help remove stains and grime. Apply a small amount of toothpaste directly onto the toothbrush. Gently scrub the rubber seals, paying special attention to the folds and corners where dirt tends to hide.
Step 3: Wipe clean
Once you’ve scrubbed the entire seal, wipe off the residue with a clean, damp cloth. You’ll notice that many of the stains and discolorations will lift right off, leaving the seals brighter and cleaner.
This simple toothpaste trick works particularly well for yellowish or greasy marks, but what if the seals are covered with black mold or mildew? In that case, it’s time to bring out a natural disinfectant—white vinegar.
Removing Mold and Disinfecting the Seals
Mold is a common issue in refrigerators, and it can spread quickly if ignored. Luckily, vinegar is one of the most effective natural solutions for killing mold spores. It’s a powerful disinfectant that eliminates bacteria, deodorizes, and cuts through grime—all without toxic fumes or residue.
Step 1: Mix your cleaning solution
In a spray bottle, combine equal parts white vinegar and water (half a cup of each is enough for one cleaning session). Shake the bottle gently to mix the two ingredients.
Step 2: Spray and let it work
Spray the mixture generously onto the rubber seals, making sure to reach the inner folds and edges. Let the solution sit for about five to ten minutes. This allows the vinegar to break down mold and dissolve any remaining dirt.
Step 3: Wipe and rinse
After letting it sit, use a clean, damp cloth to wipe away the mixture and the loosened grime. If needed, repeat the process for stubborn spots. Finally, dry the seals thoroughly with a soft towel to prevent moisture buildup—which can attract more mold later.
This vinegar cleaning method should be done at least every two weeks to keep your refrigerator seals fresh, mold-free, and fully functional.
Prevention Tips: Keeping Seals Clean for Longer
Cleaning is only half the battle—prevention is what keeps the seals spotless over time. A few small daily habits can help you avoid mold growth and unpleasant smells:
-
Keep food sealed: Store leftovers in airtight containers to prevent moisture and food particles from leaking into the fridge’s corners or seals.
-
Check expiration dates: Place foods with short shelf lives in the most visible spots so you don’t forget to use them. Expired items can release moisture and odors that feed mold.
-
Wipe spills immediately: If something leaks or spills, clean it right away with a damp cloth.
-
Air out your fridge: Once a month, leave the door open for 10–15 minutes while cleaning to let moisture evaporate.
-
Use a moisture absorber: A small bowl of baking soda or a fridge deodorizer can help maintain a dry, odor-free environment.
Final Thoughts
Your refrigerator is one of the most important appliances in your home—it stores your food and keeps your family safe. But even the best refrigerator can become a health hazard if neglected. By taking just 15 minutes every two weeks to clean and disinfect the door seals, you’ll not only maintain a fresher, cleaner fridge but also extend its lifespan and efficiency.
With a little toothpaste, vinegar, and consistency, your fridge seals will stay spotless, odor-free, and mold-resistant. Simple, effective, and natural—just the way home cleaning should be.